

Find steps below to add Group Membership Information to SAML in Azure Active Directory.
1) In Azure AD, Select the digitalcampus.swankmp.net Enterprise Application and select Single sign-on.
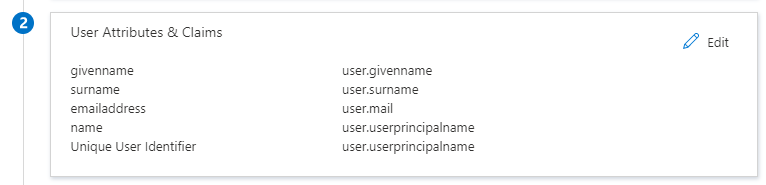
2) Select "User Attributes & Claims" and Click Edit.
- Renaming the attributes to the urn:oid standard will allow the streaming portal to identify the attribute and auto populate these required fields for instructor/admin accounts. Attributes to add:
- Required (Note: for Azure the urn:oid should go in the Name field and the Namespace should be left blank):
- First Name --> urn:oid:2.5.4.42
- Last Name --> urn:oid:2.5.4.4
- Primary email --> urn:oid:0.9.2342.19200300.100.1.3
- Required (Note: for Azure the urn:oid should go in the Name field and the Namespace should be left blank):
3 ) Click "Add a group claim"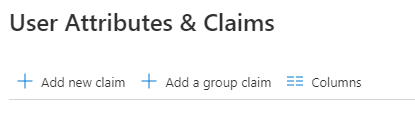
4) From here you can select which groups to return (All groups, Security groups, Directory roles or Groups assigned to the Application). In our testing we used "All Groups. You can also select the Source Attribute value to return (Group ID, sAMAccountName, etc.) Group ID would be the most specific identifier since it is unique. 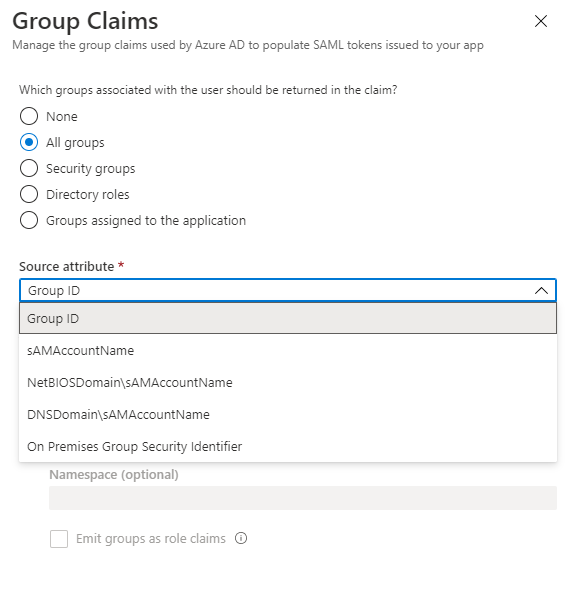
5) Then click Save.
Now the Group values should return is this Claim "http://schemas.microsoft.com/ws/2008/06/identity/claims/groups"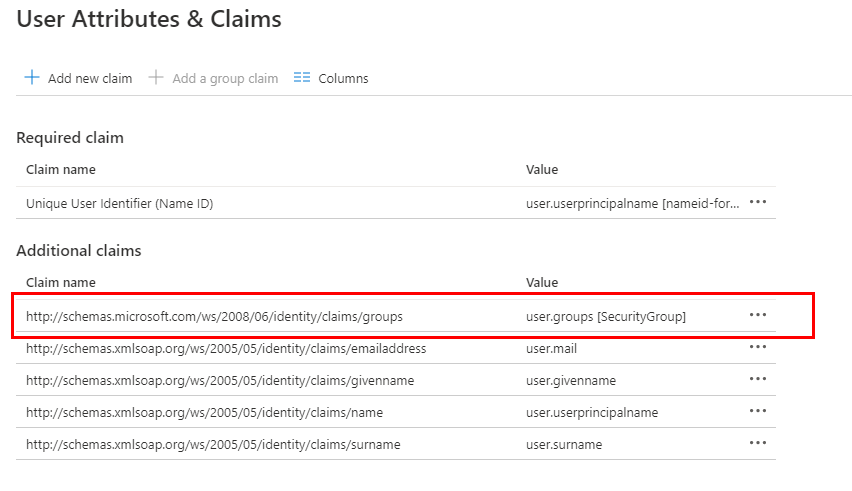
Then in Digital Campus you can create a role mapping for the appropriate Group ID.
Example: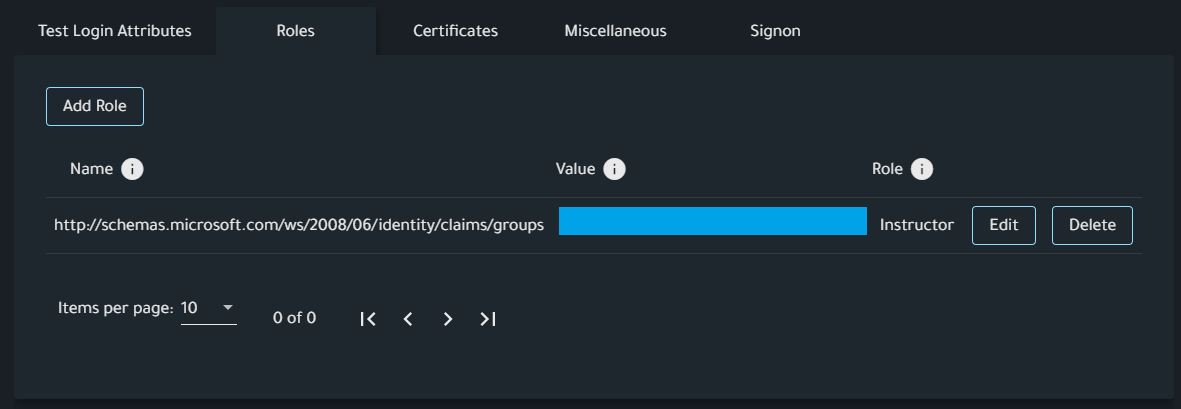
The Id returned is the Object Id of the Group defined in Azure AD:
Comments
0 comments
Article is closed for comments.