
Registered accounts are created directly on the Swank Cloud Streaming portal by an Administrator. This can be done as individual accounts or as a bulk load. We do not recommend this as a primary authentication method since it can become very labor intensive. We do however recommend keeping at least one registered account in case there are any issues with your primary authentication method.
Table of Contents
- Add Individual Users
- Bulk Import a List
- Instructor Self Registration
- Modify Existing Registered Accounts
- Device Limits
Note: It's important to remember that registered accounts and single sign on (SSO) accounts are two separate accounts and no two accounts can share the same email address. If you intend on using SSO, be sure to use a different email address for your registered account. This can be done in several ways:
- You can change the email address associated with your registered account to an entirely different email.
- Assuming your email system supports it, a "plus tagged" email address should function exactly the same as the original email address.
- For Example: user@swankmp.com could be changed to "user+1.swankmp.com" In this example, I used "+1" to distinguish this as a unique email, but messages sent to either address should arrive at the same inbox.
Add Individual Users
- Login to your streaming portal with an Administrator account
- Navigate to the Users section on the left menu
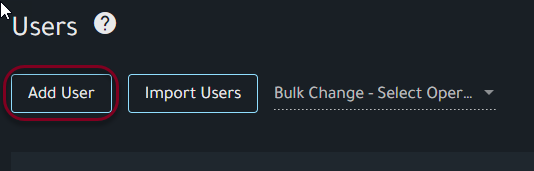
- Click Add User
- Complete the Personal Information form. A Username, Role, and Password are the minimum requirements, but the First Name, Last Name, and Email are all required for accounts with an Instructor or Admin role. If not entered on creation, the user will be prompted for the information on the initial login.
- Additional information on user Roles can be found here: Cloud Streaming - User Roles
- Password Requirements
- The password must be at least 12 characters
- The password must contain at least 2 of the following
- Capital letter
- Number
- Special character
- Click Save
- The user will receive an automatic email to verify the address before the account will be active.
- On their initial login they will be prompted to reset the password.
Bulk Import a List
Note: You will not be able to import/update a user who already has an account.
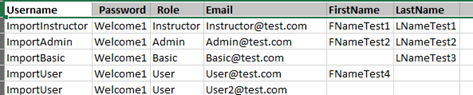
The bulk import file must be a CSV containing columns with the headings:
- Username
- Password
- Optional
- Role - If no role is specified, the user will get the Basic role.
- FirstName - Required for Instructor and Admin roles, but optional for all others.
-
LastName - Required for Instructor and Admin roles, but optional for all others.
- Create a CSV file with the appropriate headers including spacing and case sensitivity. For convenience, you may download a template here
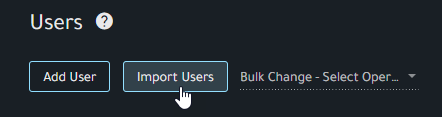
- Click Import Users
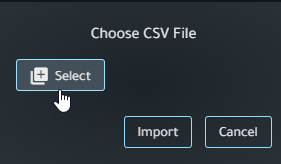
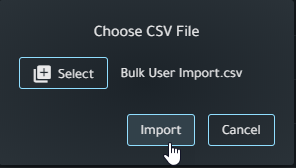
- Click Select and open your CSV file
- Click Import
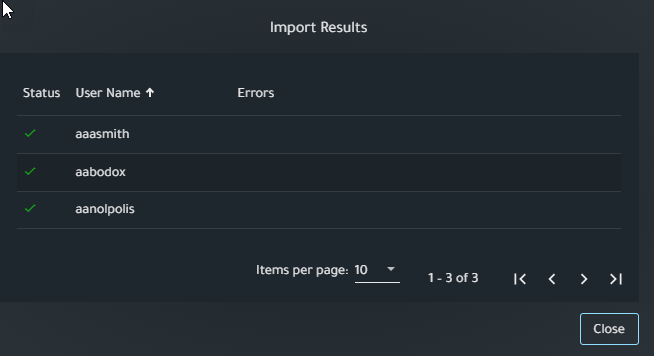
- The status of your import will be displayed
- The users will receive an email to verify their account. You will see a checkmark under Verified when the account is ready.

- If needed the user can resend the verification email when logging in for the first time.
Instructor Self Registration
Note: Swank will need to enable the Self Registration option and will require any email domains that should be allowed to self-register. User instructions for self-registration can be found here: Instructor Self Registration
If your organization requires a Self-Registration Code, it can be managed on the Authentication page from your Swank Admin account. If your code has expired, you can click on the Create New Registration Code button.
From this panel you can set the expiration date and number of uses if desired:
Modify Existing Registered Accounts
Note: Only an Admin level account can modify existing accounts of other users.
From the Users page select the dropdown menu to the right of the account you would like to modify and select the action you would like to take.
- Edit Profile - Modify user information.
- Manage Devices - See Device Limits below.
- Lock - Prevents user from logging in.
- Delete - Delete account from your registered users. (Note: If you receive a message "Error: Error deleting user" it is an indication the account has made title requests previously, and you will not be able to delete it since it has other associated records in the database. You can lock the account and set it to a basic role to minimize access to the portal.)
Device Limits
Users who have reached the maximum number of allowed devices (10) will be presented with the following error message when attempting to sign in:
- "This account has exceeded the number of devices permitted. Log into your account from a previously used device and manage the list of devices associated with your profile."
To avoid this error, registered devices can be cleared using one of the following methods:
- Log into the account from a previously used device and clear devices by going to Device Manager.
- Navigate to the Users Manager area from an account with the Administrator role
- On the far right of the affected account, you will see a drop-down menu with the Manage Devices option.

Both of these methods will bring you to a screen where you can select the logged devices and remove them.
Notes:
- Device tracking applies only to registered users of non-shared accounts.
- Proxy users, Single Sign On (SSO) users and IP authenticated users are not affected.
- Accounts classified as "shared" are not affected.
- Please bear in mind that every browser on every device used with this account counts as a different device.
- Browser upgrades are not considered new "devices."
- A user clearing browser cookies without "de-registering" a device will result in an abandoned "device" remaining in the user's list.
- Users who frequent the service from a computer lab setting will likely reach their maximum number of allowed devices very quickly.
- Computer lab environments that clear browser cookies after every log-out will cause users to hit their device limit even more quickly.
Comments
0 comments
Please sign in to leave a comment.